Upgrading the radio in your Honda Acty can be a straightforward and satisfying DIY project. Here's a step-by-step guide to help you smoothly replace the radio in your kei truck, ensuring you enjoy your favorite tunes on the go.
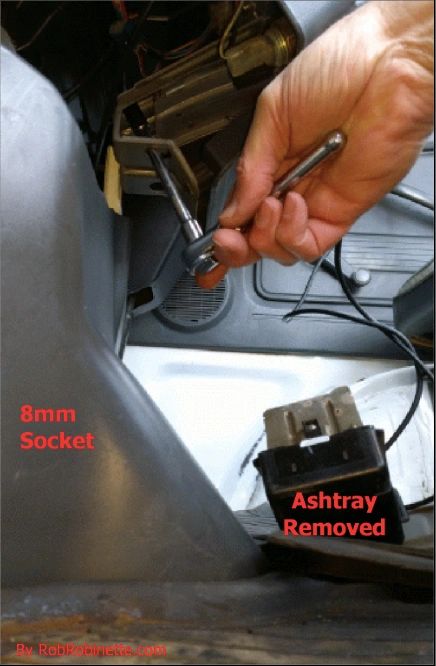
1. Preparing for Removal:Begin by removing the ashtray to access the radio bracket. Inside the top of the ashtray compartment, you'll find two 8mm bolts. These bolts are crucial as they secure the radio bracket in place.

2. Tools for the Task:Although these bolts feature a Phillips Head slot suitable for a screwdriver, an 8mm socket wrench is likely more effective for this job. The wrench should be inserted through a hole in the ashtray bracket to reach these bolts.
3. Radio Extraction:Once the bolts are removed, gently slide out the radio. You'll notice the radio electrical plug typically has four conductors: switched 12V, ground, and left speaker positive and negative.

4. Understanding the Wiring:In some Honda Acty models, you might encounter a 6-conductor radio plug. The antenna connector is usually located to the right of the electrical plug. The larger connector's wires include switched 12V (yellow with red stripe), ground (black), left speaker positive (blue), and left speaker negative (gray with black stripe). The smaller connector might have unswitched 12V (white with blue stripe) and 12V for instrument panel lights (red with black stripe). It's important to note that not all models have right door speaker wires.

5. Harness Compatibility:For a hassle-free installation, consider purchasing a wiring harness from eBay that's compatible with the ACTY radio connectors. Search for "ACTY wiring harness" to find suitable options. If your new radio requires a constant, un-switched 12V source for memory retention, use the small connector's white with blue stripe wire.
6. Cigarette Lighter Modification (Optional):If you prefer the cigarette lighter to switch off with the key, change its power supply to the radio's yellow-red wire. However, be cautious, as the cigarette lighter will no longer be able to heat up due to limited power capacity. This modification is ideal if you plan to use the lighter receptacle for low-power devices like GPS or USB converters.
By following these steps, you can successfully upgrade the radio in your Honda Acty, enhancing your driving experience with the convenience of modern audio technology. Stay tuned to the OIWA blog for more insightful tips and guides on maximizing your Honda Acty's potential.


